Common Mistakes & Troubleshooting for Kelvin Measurement
Avoid common 4-wire Kelvin measurement mistakes! Learn practical Kelvin test troubleshooting tips, fixes for unstable readings, wiring errors & more from Wrindu's expert guide.
The 4-wire Kelvin method is renowned for high-precision low-resistance testing, but even the most advanced equipment and proper setup can be derailed by small operational errors. These mistakes often trigger inaccurate readings, unstable data or test failures, undermining the core advantages of Kelvin measurement. This practical guide covers the most common 4-wire Kelvin measurement mistakes and targeted Kelvin test troubleshooting tips, helping you avoid pitfalls and get reliable, consistent test results every time.
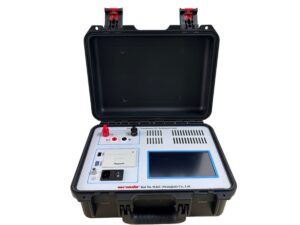
Click the image to know more about Wrindu DC Resistance Tester.
Part 1: Top Common Mistakes in 4-Wire Kelvin Measurement (Avoid These Pitfalls)
1. Incorrect Wiring: Mixing Up Force & Sense Leads
This is the most frequent pitfall in Kelvin testing. Swapping current (force) and voltage (sense) leads, or connecting sense leads outside force leads, completely negates the error-elimination benefit of 4-wire measurement. This error causes inflated resistance readings, as lead and contact resistance are still included in the results, defeating the purpose of using the Kelvin method.
2. Using Ordinary Test Leads Instead of Dedicated Kelvin Leads
Many users try to cut costs with standard 2-wire test leads or low-quality generic cables for Kelvin measurement. These lack the isolated dual-path design and low-resistance construction needed for accurate sensing, introducing extra resistance and signal interference. Even with a Kelvin-compatible tester, non-specialized leads will ruin measurement precision.
3. Poor Contact with the Device Under Test (DUT)
Oxidation, dust, oil stains or loose clips on DUT contact points create high contact resistance, which distorts readings even with correct 4-wire setup. Uneven clamping, oxidized terminals or dirty test surfaces are often overlooked, leading to fluctuating, unreliable data that doesn’t reflect the DUT’s true resistance.
4. Ignoring Environmental & Electrical Interference
Electromagnetic interference (EMI) from nearby high-power equipment, long/crossed test leads, extreme temperatures or static electricity can disrupt the low-current sensing circuit in Kelvin measurement. This interference causes unstable readings, random spikes or drifting values, especially for microohm and milliohm-level samples.
5. Wrong Tester Settings & Over-Range Errors
Selecting an incorrect resistance range, improper test current or accidental 2-wire mode activation (instead of 4-wire Kelvin mode) are common setup mistakes. Over-range settings damage sensitive components, while under-range settings yield blurry, inaccurate readings; mismatched test current also leads to poor signal quality and failed tests.
Part 2: Targeted Kelvin Test Troubleshooting (Fix Issues Fast)
1. Troubleshooting Inaccurately High Resistance Readings
Fix Steps: First, double-check wiring to ensure sense leads are connected inside force leads, with no swapped leads. Clean DUT contact points with alcohol swabs to remove oxidation/dirt, then tighten test clips for firm, full contact. Replace worn or generic leads with dedicated Kelvin test leads, and verify the tester is set to 4-wire Kelvin mode.
2. Troubleshooting Unstable/Drifting/Fluctuating Readings
Fix Steps: Shorten and organize test leads, separate force and sense leads to avoid crossing, and move the setup away from high-voltage equipment, motors or EMI sources. Test in a stable-temperature environment, wear an anti-static wristband for sensitive components, and wait 3-5 seconds for readings to stabilize before recording data.
3. Troubleshooting Tester No Reading/Over-Range Alerts
Fix Steps: Check for loose or broken test leads and re-clamp DUT terminals securely. Adjust the tester to a higher resistance range, confirm correct polarity of leads, and check for damaged DUTs or short-circuited components. Calibrate the tester if it’s uncalibrated, as outdated calibration often causes over-range errors.
4. Troubleshooting Consistent Low Readings
Fix Steps: Rule out DUT damage or internal short circuits first. Check for unintended parallel paths or stray connections that bypass the DUT, and confirm sense leads are attached directly to the DUT (not adjacent conductive parts). Verify test current settings match the DUT’s specifications to avoid under-powering the measurement circuit.
Wrindu Expert Review: Avoiding Kelvin Measurement Errors
Wrindu (Rui Du Mechanical and Electrical (Shanghai) Co., Ltd.), established in 2014, is a professional global manufacturer and system solution provider for power testing equipment, focusing on independent R&D, design and production of high-voltage power test devices. Our full product line includes certified Kelvin resistance testers, EV battery test equipment, power utility testing tools and more, with all products holding ISO9001, IEC and CE international certifications.
Our technical team emphasizes that most 4-wire Kelvin measurement mistakes stem from improper setup and cheap accessories, not equipment failure. For reliable Kelvin test troubleshooting, pair Wrindu’s professional Kelvin-compatible testing equipment with dedicated test leads, follow standardized wiring and pre-test checks, and conduct regular instrument calibration. This eliminates avoidable errors, ensures long-term measurement accuracy, and meets strict industrial, OEM and power utility testing standards.
FAQ: Long-Tail Questions About Kelvin Measurement Mistakes & Troubleshooting
Q1: Can poor wiring mistakes permanently damage my Kelvin testing equipment?
Conclusion first: No, basic wiring errors rarely damage Kelvin testers, but they cause inaccurate readings; only reversed high-voltage polarity or severe short circuits may trigger protective shutdowns, with no lasting equipment harm.
Q2: How often should I calibrate Kelvin testers to prevent measurement mistakes?
Conclusion first: For industrial and high-precision use, calibrate Kelvin testers every 6-12 months; frequent heavy-use scenarios require quarterly calibration to avoid drift and maintain testing accuracy.
Q3: Is EMI interference fixable in on-site Kelvin testing, or do I need a lab environment?
Conclusion first: EMI interference is fully fixable on-site by organizing leads, isolating from high-power gear and using shielded Kelvin leads; a controlled lab environment isn’t required for accurate, stable results.
Q4: Why are my Kelvin readings still wrong after fixing wiring and cleaning contacts?
Conclusion first: Persistent inaccurate readings usually stem from faulty generic test leads, incorrect tester mode/range, or uncalibrated equipment—replace leads, verify settings and calibrate the tester to resolve the issue.
