Wrindu Expert Tips for Accurate 4-Wire Kelvin Testing
Get professional precision tips for Kelvin resistance measurement to improve accuracy. Learn pre-test prep, correct wiring, setup best practices and expert advice from Wrindu.
Mastering 4-wire Kelvin measurement is about more than just using the right equipment—it’s about executing with precision, attention to detail, and an understanding of subtle technical nuances. For professional engineers, technicians, and quality control teams, achieving consistently accurate, reliable results requires expertise beyond basic setup. This guide shares actionable, industry-proven precision tips for Kelvin resistance measurement to help you optimize performance, eliminate hidden errors, and maximize the value of your Kelvin testing equipment.
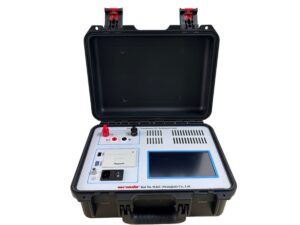
Click the image to know more about Wrindu DC Resistance Tester.
Core Pre-Test Preparation: The Foundation of Accuracy
1. Rigorous DUT Contact Cleaning & Handling
Expert Tip: Never underestimate the impact of contact quality. Even the best Kelvin setup will fail if the Device Under Test (DUT) has oxidation, oil residue, or dirt on its terminals.
- Action: Clean contact points with isopropyl alcohol before testing. For heavy oxidation, use a fine-grit cleaning cloth or terminal cleaner.
- Rationale: Oxidation creates high contact resistance, which invalidates Kelvin’s error-elimination benefit. Clean contacts ensure a true, low-resistance connection.
2. Instrument Calibration: The Non-Negotiable Pre-Step
Expert Tip: Calibration is not a one-time task—it’s an ongoing requirement for precision.
- Action: Calibrate your Kelvin tester at the start of each testing session, and perform a full official calibration every 6–12 months (or quarterly for high-frequency industrial use).
- Rationale: Drift in measurement circuitry is inevitable. Calibration ensures your instrument’s readings align with international standards (ISO, IEC).
3. Dedicated Kelvin Test Leads: Non-Negotiable
Expert Tip: “Penny wise, pound foolish” applies here. Cheap, generic leads will negate Kelvin’s precision.
- Action: Always use genuine Wrindu Kelvin test leads with insulated, color-coded connections (red/black for current, white/blue for voltage).
- Rationale: Generic leads lack the isolated path design needed to separate current and voltage signals, reintroducing lead resistance errors.
Optimal Wiring & Setup Techniques
1. Master the “Sense Inside Force” Rule
Expert Tip: This is the single most important wiring rule for Kelvin testing.
- Action: Connect voltage-sense leads inside the current-force leads on the DUT. Never reverse or swap leads.
- Rationale: This ensures the sense circuit measures only the DUT’s true resistance, excluding lead and contact resistance.
2. Minimize Lead Length & Separate Paths
Expert Tip: Long, tangled leads are enemies of precision.
- Action: Keep Kelvin leads as short as possible (ideally <1 meter for microohm measurements). Route force and sense leads separately, avoiding parallel runs or crossings.
- Rationale: Longer leads increase resistance and pick up electromagnetic interference (EMI), causing signal drift.
3. Secure Clamping for Consistent Pressure
Expert Tip: Loose or inconsistent clamping creates variable contact resistance.
- Action: Use Kelvin clips with sufficient spring tension. For flat terminals, use a fixture to apply uniform pressure.
- Rationale: Even a 0.1mm gap can introduce milliohm-level errors in low-resistance measurements.
Operational Best Practices for On-Site & Lab Use
1. Stabilize the Measurement Environment
Expert Tip: Kelvin measurements are sensitive to external disruptions.
- Action:
- Keep tests away from high-power equipment, motors, or transformers to avoid EMI.
- Avoid testing in extreme temperature fluctuations (aim for 20–25°C).
- For sensitive components, wear an anti-static wristband.
- Rationale: EMI and temperature changes disrupt the low-current sense circuit, leading to fluctuating readings.
2. Verify Settings Before Activating Measurement
Expert Tip: A simple mode mix-up can ruin hours of work.
- Action:
- Double-check that the instrument is set to 4-Wire Kelvin Mode (not 2-Wire).
- Select the correct resistance range (start high, then fine-tune).
- Set the test current appropriately (lower for heat-sensitive components).
- Rationale: Accidental 2-Wire mode activation includes lead resistance in the reading, defeating the purpose of Kelvin testing.
3. Take Multiple Readings & Calculate Averages
Expert Tip: Single readings are prone to random errors.
- Action: Take 3–5 consecutive readings and calculate the average. Discard any obvious outliers.
- Rationale: Averaging smooths out minor fluctuations, providing a more representative true resistance value.
Wrindu Expert Perspective: Elevating Kelvin Testing to Industry Standards
Wrindu (Rui Du Mechanical and Electrical (Shanghai) Co., Ltd.), a global leader in power testing equipment with ISO9001, IEC, and CE certifications, emphasizes that precision tips for Kelvin resistance measurement are as much about process as they are about equipment.
“At Wrindu, our technical team works with engineers from power utilities, EV manufacturing, and electronics production every day. The biggest difference between a novice and an expert is not the tool they use, but how they use it,” says a Wrindu senior engineer. “Our Kelvin testers are designed to deliver industry-leading accuracy, but that potential only unlocks when users follow these expert practices. For example, combining our high-precision Kelvin meters with our custom test leads and following our standardized wiring protocols is what separates good measurements from great ones.”
Wrindu’s expert recommendations align with industrial best practices:
- Integrate Kelvin testing into your quality control (QC) workflow as a non-negotiable step, not an afterthought.
- Train your team on these precision tips to reduce human error and ensure consistency across shifts and operators.
- For OEM production lines, automate Kelvin testing where possible to eliminate variability and increase throughput.
FAQ: Advanced Questions About Kelvin Precision
Q1: How do I choose the right test current for my Kelvin measurement?
Select the test current based on the DUT’s power rating and measurement goals.
- For low-power, heat-sensitive components (e.g., microchips), use the lowest possible current that provides a clear signal.
- For high-current applications (e.g., busbars, shunts), use a higher current for better signal-to-noise ratio.
- Always check the DUT’s specifications to avoid overheating.
Q2: Can I use Kelvin testing for high-resistance components?
Kelvin testing is optimized for low-resistance measurements (milliohm/microohm range). It’s not necessary or cost-effective for high-resistance components (above 1kΩ).
- For high-resistance parts, standard 2-wire testing is sufficient and more efficient.
- Kelvin’s precision benefits are most pronounced when measuring ultra-low resistances where lead resistance is a significant factor.
Q3: How do I troubleshoot persistent measurement drift?
Drift is almost always caused by environmental interference or equipment issues, not the Kelvin method itself.
- Check for EMI by moving the test away from high-power equipment.
- Verify leads are not damaged or frayed.
- Recalibrate the instrument to rule out drift.
- Ensure the test environment has stable temperature and humidity.
Q4: Does Wrindu offer training or resources to help master these precision tips?
Yes, Wrindu provides comprehensive technical support and training resources.
- We offer on-site training for industrial clients to ensure their teams can implement these expert tips.
- Our website and customer portal include video tutorials, application notes, and troubleshooting guides tailored to precision tips for Kelvin resistance measurement.
- Our technical support team is available 24/7 to assist with any measurement challenges.
