Low Resistance Measurement | 4-Wire Kelvin Method Guide | Wrindu
Complete guide to low resistance measurement with 4-Wire Kelvin method: achieve accurate mΩ/μΩ level readings for industrial electronics, EV parts, connectors and other critical components.
Measuring low resistance values—especially milliohm (mΩ) and microohm (μΩ) levels—can be extremely tricky with standard testing methods. Tiny errors from lead resistance, contact resistance or poor setup can completely skew results, making it impossible to get reliable data for industrial components.
The 4-Wire Kelvin Method is the industry gold standard for low resistance measurement, designed to eliminate common testing errors and deliver precise, repeatable readings for ultra-low resistance values. This complete guide breaks down how to use this method effectively, covers practical workflows for special components, and helps you master accurate low-resistance testing.
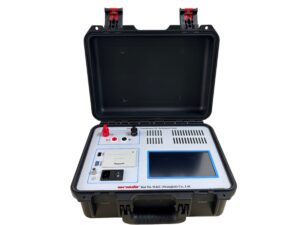
Click the image to know more about DC Resistance Tester.
Why 4-Wire Kelvin Method Dominates Low Resistance Measurement
Standard 2-wire testing combines current flow and voltage sensing in one set of leads, which means lead resistance and contact resistance are added directly to the actual resistance of the Device Under Test (DUT). For mΩ/μΩ level measurements, these extra resistances are often larger than the DUT’s true resistance, making results totally inaccurate.
The 4-Wire Kelvin Method fixes this by using two separate pairs of leads:
-
Current Leads (I+/I-): Carry the test current to and from the DUT, handling resistance from leads and contacts
-
Voltage Sensing Leads (V+/V-): Measure only the voltage drop across the DUT, ignoring external resistance interference
This separation makes it the only reliable way to measure milliohm and microohm level resistances, ideal for critical industrial applications like EV battery tabs, wire harnesses, PCB traces, power connectors, welding joints and conductive materials.
Wondering how it stacks up against traditional testing? Check: 2-Wire vs 4-Wire Resistance Measurement
Practical Workflow for 4-Wire Kelvin Low Resistance Measurement
1. Prep Equipment & DUT Correctly
Start by gathering dedicated Kelvin testing gear—never use standard alligator clips or generic test leads, as they ruin low-resistance accuracy. Clean DUT terminals and probe tips with isopropyl alcohol to remove oxidation, dust, flux or oil, since even thin buildup adds unwanted contact resistance. Inspect leads for damage and ensure your tester is calibrated to maintain precision.
2. Set Up Leads Properly (Critical for Accuracy)
Follow the standard Kelvin configuration: attach current leads to the outer points of the DUT, and voltage sensing leads to the inner points directly on the test area. Double-check polarities to avoid cross-connection, and keep leads short to minimize electromagnetic interference (EMI) and extra lead resistance.
3. Optimize Test Settings for mΩ/μΩ Readings
Set the test current based on the DUT’s specifications to avoid overheating (which alters resistance values). Start with the highest measurement range, then use auto-range or manually select a range slightly above your expected low resistance value. For delicate components, use low-current modes to protect the DUT while maintaining accuracy.
4. Test & Validate Readings
Take 3-5 repeated measurements and calculate the average to cancel out random small errors. Ensure stable probe contact (use a fixture for consistency) and let the setup reach thermal equilibrium to eliminate thermal EMF interference, which is especially disruptive for micro-level low resistance readings.
For top-tier gear to streamline your testing, explore: best tools for 4-wire Kelvin measurement
FAQs: Low Resistance Measurement with 4-Wire Kelvin Method
Q1: What resistance range is the 4-Wire Kelvin Method best for?
A: The 4-Wire Kelvin Method is optimized for low resistance measurements (below 1Ω), covering milliohm (mΩ) and microohm (μΩ) levels. It’s ineffective for high-resistance testing (above 100kΩ), where 2-wire testing is more practical.
Q2: Why can’t I get accurate microohm readings with 2-wire testing?
A: 2-wire testing includes lead and contact resistance in the final reading, which can be dozens of milliohms—far larger than the microohm-level DUT resistance. This masks the true value, making 2-wire testing useless for ultra-low resistance measurements.
Q3: How do I handle low resistance testing for small SMD components?
A: Use spring-loaded or ceramic Kelvin probes designed for SMD parts to ensure tight, precise contact. Keep probes clean, apply consistent light pressure, and use a mini test fixture to stabilize the component during testing for accurate mΩ/μΩ readings.
Q4: Does thermal EMF affect low resistance Kelvin measurements?
A: Yes, thermal EMF from temperature differences between leads and the DUT creates small voltage shifts that disrupt micro-level readings. Let your setup acclimate to ambient temperature for 3-5 minutes before testing to fix this issue.
Q5: How long should Kelvin test leads be for low resistance measurement?
A: Keep leads as short as possible (ideally under 1 meter) to reduce inherent lead resistance and EMI interference. Longer leads introduce extra resistance that can compromise mΩ/μΩ measurement accuracy.
Q6: What causes fluctuating readings during low resistance Kelvin testing?
A: Fluctuations typically come from poor/dirty probe contact, unstable pressure, thermal EMF, nearby electrical noise, or damaged Kelvin leads. Clean contacts, stabilize pressure, and shield leads to resolve unstable values.
Q7: Can I use the 4-Wire Kelvin Method for EV and power component testing?
A: Absolutely, it’s the preferred method for testing EV battery contacts, power cables, busbars and utility components, as these parts require ultra-precise low resistance checks to ensure safety and performance.
How Wrindu Tester Stands Out for Low Resistance Kelvin Measurement
Wrindu’s dedicated DC Resistance Testers are engineered specifically for accurate mΩ/μΩ low resistance measurement, solving the biggest pain points of 4-wire Kelvin testing and delivering industrial-grade reliability:
-
Ultra-High Precision Readings: Capable of stable microohm-level measurements, perfectly calibrated for low resistance testing with zero distortion from lead/contact resistance.
-
Anti-Interference & Thermal EMF Protection: Built-in shielding and noise reduction technology eliminates EMI and thermal EMF errors, ensuring consistent readings even in harsh factory environments.
-
Smart Auto-Range & Low-Current Modes: Automatically adjusts to optimal low resistance ranges, prevents DUT overheating, and safeguards delicate industrial components during testing.
-
Matched Dedicated Kelvin Leads: Included high-quality 4-conductor leads ensure perfect current-voltage separation, plug-and-play setup, and consistent low-resistance accuracy.
-
Wide Industrial Compatibility: Optimized for EV parts, electronics, power utilities, connectors and PCB assemblies, with durable design for heavy-duty production line use.
-
User-Friendly Operation: Simplified controls reduce operator error, with clear digital displays for easy reading of mΩ/μΩ values, no complex setup required.
Explore More Expert Resources
👉 Back to 4-Wire Kelvin Method Ultimate Guide
👉 Learn More:4-wire Kelvin method for power utilities
