Earth Resistance Testing: Why and How? A Complete Guide for Electrical Safety
Learn the complete guide to earth resistance testing, including the 7-step structured grounding survey, fall-of-potential method, soil resistivity testing, and safety principles. Understand why proper earthing is critical for electrical system protection and fault current safety.
Effective earthing (grounding) is one of the most critical yet often overlooked aspects of electrical system safety. Without a reliable earth connection, fault currents cannot be safely diverted, putting both lives and property at serious risk. This guide explains why earth resistance testing matters, how to perform it correctly, and answers the most common questions about earthing system maintenance.
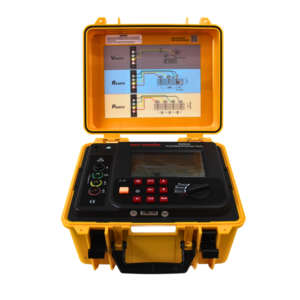
Click the picture to know more about Wrindu Earth Resistance Tester.
Why Earth Resistance Testing Matters
Every electrical power distribution system is designed so that when an insulation failure or fault occurs, the fault current is diverted safely into the earth. This prevents exposed metal parts from reaching dangerous voltage levels while allowing enough fault current to flow so that protective devices (circuit breakers, fuses) can operate and isolate the fault.
Without a reliable earth connection, safety is compromised — and lives and property are at risk.
A good earthing system provides a dependable, low-resistance path to the earth using electrodes (typically rods or mats). But even the best-designed system can degrade over time due to factors beyond human control.
What Causes Earthing Systems to Degrade?
This is why regular testing isn’t optional — it’s essential.
The 7-Step Structured Earthing Survey
For reliable results, a comprehensive earthing survey should follow these seven key steps:
Step 1: Visual Inspection
Closely inspect the entire earthing installation for signs of physical damage, broken or disconnected conductors, and corrosion on electrodes and connection points.
Safety warning: A disconnected earthing conductor may be live. Always check for voltage before touching it.
Step 2: Measure Leakage Currents
Use a clamp meter (capable of measuring milliamps) to check for leakage currents in earth conductors. Ideally, there should be zero current. If significant leakage is found, trace and fix the source before proceeding.
Step 3: Test Continuity of Earth Conductors
Use a low-resistance ohmmeter (micro-ohmmeter) — not a standard multimeter — to detect high-resistance joints. “High resistance” in this context means anything from 100 micro-ohms upward, which ordinary multimeters cannot measure accurately.
Step 4: Safely Disconnect Earth Electrodes
Never break earth connections without evaluating safety implications first. De-energize and lock out equipment, and consider hazards from induced voltages.
Step 5: Perform the Fall-of-Potential Test (The Gold Standard)
This is the most accurate and reliable method for measuring earth resistance.
How it works:
- Connect an earth resistance test set to the electrode
- Place a current spike far away from the electrode
- Place a voltage spike at various distances along a straight line between the electrode and current spike
- At each distance, measure voltage and calculate resistance using Ohm’s Law: R = V / I
- Plot resistance values against distance — the flat region of the curve gives you the true earth resistance
Step 6: Measure Touch and Step Potentials
- Touch potential: Voltage a person experiences when standing on ground and touching an earthed object during a fault
- Step potential: Voltage difference between a person’s feet when standing on ground with fault current flowing
Step 7: Measure Soil Resistivity (Wenner Method)
Using a four-terminal earth tester (not three-terminal), four temporary spikes are placed at specific spacings. The spacing determines the depth of measurement. This helps in designing new earthing systems or diagnosing poor performance.
FAQs About Earth Resistance Testing
Q1: How often should earth resistance testing be performed?
Most standards recommend at least annually, with more frequent testing for critical installations, facilities in harsh environments, or after nearby construction work.
Q2: What is a good earth resistance value?
Generally, values below 5 ohms are excellent, 5–10 ohms are good, and values above 25 ohms may require attention. Some sensitive equipment may need less than 1 ohm.
Q3: Can I measure earth resistance without disconnecting the electrode?
Yes — techniques like ART (attached rod technique) and stakeless clamp-on testing allow this. However, they have limitations and are less accurate than the fall-of-potential method.
Q4: Why can’t I use a regular multimeter for continuity testing?
Standard multimeters cannot accurately measure resistance in the micro-ohm range. Earthing conductors require micro-ohmmeters to detect high-resistance joints starting from about 100 micro-ohms.
Q5: What is the difference between earth resistance and soil resistivity?
Earth resistance measures the resistance of a specific electrode to earth. Soil resistivity measures the intrinsic resistivity of the soil itself, independent of any electrode.
Q6: What equipment do I need for earth resistance testing?
An earth resistance test set (four-terminal for soil resistivity), a low-resistance ohmmeter, a clamp meter (milliamp range), and temporary earth spikes.
Q7: Is earthing testing disruptive?
Yes, but this is a small price to pay for human safety. A structured step-by-step approach minimizes disruption while ensuring reliable results.
What happens if an earthing system fails during a fault?
Exposed metal parts can rise to dangerous voltages, creating electrocution risks. Fault current may also be too low to trip protective devices, allowing dangerous conditions to persist.
How does soil moisture affect earth resistance?
Dry soil has much higher resistivity than moist soil. Seasonal changes can cause significant variation, which is why initial designs should account for seasonal conditions.
Can corrosion really make an earthing system unsafe?
Yes. Corrosion at connection points or on the electrode increases resistance, reducing the system’s ability to safely divert fault current. Regular inspections catch this early.
What is the Wenner method for soil resistivity testing?
Four equally-spaced temporary spikes are used. Current passes between the outer spikes, voltage is measured between the inner spikes. The spacing determines measurement depth.
Why do I need a four-terminal instrument for soil resistivity?
Three-terminal instruments combine voltage and current paths internally, making them unsuitable for accurate soil resistivity measurements.
How do you test earthing in buildings with multiple electrodes?
Multi-electrode systems and earthing grids require more complex procedures. Specialized guides like Wrindu Earth Resistance Tester provide detailed methodologies.
What is touch potential and why is it important?
It’s the voltage a person may experience when touching an earthed object during a fault. High touch potential can cause severe electric shock.
Can earthing problems exist without obvious issues?
Yes. Faulty equipment can leak current to earth while appearing to operate normally. This is why leakage current measurement is critical.
Summary: Key Takeaways
- Effective earthing is not optional — it is a fundamental safety requirement
- Testing must be regular — not just during commissioning, but throughout the system’s life
- Follow a structured approach — visual inspection, leakage measurement, continuity testing, and fall-of-potential testing
- Use the right tools — micro-ohmmeters, earth resistance test sets, and four-terminal instruments
- The fall-of-potential method is the gold standard for definitive, reliable measurement
- Include touch potential, step potential, and soil resistivity for a complete picture
