What Is No Load Loss in a Transformer and Why It Matters?
Learn what no load loss of a transformer is, how it differs from load loss, why utilities care, and how engineers measure it accurately for efficiency and cost control.
The no load loss of a transformer is a key parameter used to evaluate transformer efficiency and long-term operating cost. It represents the energy a transformer consumes even when it delivers no power to the load. For utilities, manufacturers, and test engineers, understanding no load loss is essential for correct transformer selection and reliable testing.
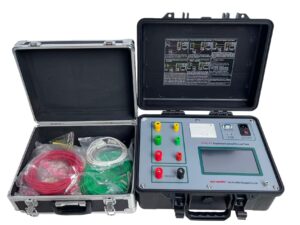
Click the picture to know more about Wrindu Transformer No-load and Load loss Tester.
What Is No Load Loss in a Transformer?
No load loss refers to the power loss that occurs when a transformer is energized at rated voltage while the secondary side remains open. In this condition, no load current flows, but the transformer still consumes power.
This loss comes mainly from the magnetic core. When voltage is applied, the core must establish a magnetic field. The repeated magnetization of the core causes hysteresis loss, while circulating currents inside the core material cause eddy current loss. Together, these form the no load loss of a transformer.
Unlike other losses, no load loss stays almost constant. It does not depend on load current and remains present as long as voltage and frequency stay stable.
Why Does No Load Loss Occur Without Any Load?
Many users wonder why a transformer consumes power when it supplies no electricity to customers. The reason lies in the physics of magnetism.
A transformer cannot operate without magnetizing its core. This magnetization requires energy. Part of that energy converts into heat inside the core material. As a result, no load loss exists even when the transformer does no external work.
Because transformers often remain energized day and night, these small losses accumulate over time and become significant.
What Is the Difference Between No Load Loss and Load Loss?
The difference between no load loss and load loss is one of the most common questions in transformer testing.
No load loss occurs when no current flows to the load and comes from the transformer core. It mainly depends on voltage, frequency, and core design. Load loss appears only when the transformer supplies current. It comes from resistance in the windings and increases as load current rises.
In practical terms, no load loss dominates during light-load operation, while load loss becomes more important at high load. Both losses affect efficiency, but they influence operating cost in different ways.
Why Do Utilities Care About No Load Loss?
Utilities pay close attention to no load loss because transformers operate continuously, even during low demand periods. A transformer may run at partial load for most of its service life, which makes no load loss a constant source of energy consumption.
Lower no load loss helps utilities reduce long-term energy costs, meet efficiency regulations, and lower carbon emissions. Many utilities accept a higher purchase price if it leads to lower lifetime losses. For this reason, no load loss often plays a decisive role in transformer procurement decisions.
How Is No Load Loss of a Transformer Measured?
Engineers measure no load loss by applying rated voltage to the primary winding while keeping the secondary winding open. The input power measured under these conditions represents the no load loss.
Accurate measurement requires stable voltage, controlled frequency, and proper demagnetization. Residual magnetism or voltage fluctuation can cause inconsistent results. This is why professionals rely on high-precision test equipment.
Wrindu develops transformer loss testing instruments designed to deliver stable readings, reduce test errors, and support both factory and field testing.
How Does No Load Loss Affect Transformer Efficiency?
Transformer efficiency depends on the balance between no load loss and load loss. At light load, no load loss has a larger impact on efficiency. At heavy load, winding losses become more significant.
Distribution transformers often operate far below rated load. In these cases, reducing no load loss improves real-world efficiency more than reducing load loss. This makes no load loss a key parameter in modern energy-efficient transformer design.
Common Questions from Wrindu Test Engineers
Test engineers often ask whether no load loss changes over time. Core aging and insulation stress can cause a gradual increase. Others ask why repeated tests show different values. In most cases, unstable voltage or residual magnetism explains the variation.
Why do no load loss test results vary when tests are repeated?
Small changes in test conditions often cause this issue. Unstable supply voltage is the most common reason. Residual magnetism in the transformer core can also affect results if demagnetization is incomplete. Wrindu test engineers recommend stabilizing voltage and performing proper demagnetization before each test.
Does ambient temperature affect no load loss measurement?
Temperature has a limited effect on no load loss compared to voltage and frequency. However, extreme ambient temperatures may influence measurement stability during long test periods. Maintaining a consistent test environment helps improve result repeatability.
Does no load loss increase as a transformer ages?
Yes, no load loss can increase gradually over time. Core material aging and long-term thermal stress contribute to this change. Regular testing allows utilities to track efficiency trends and detect early performance degradation.
Can field testing provide the same accuracy as factory testing?
Field testing can achieve high accuracy when engineers follow correct procedures. Stable input power, controlled frequency, and high-precision instruments are essential. Wrindu testing equipment supports reliable no load loss measurement in both factory and field environments.
Why is demagnetization important before no load loss testing?
Residual magnetism in the core distorts magnetic flux distribution and leads to inaccurate readings. Proper demagnetization restores a stable magnetic state and improves measurement consistency.
