Testing a Circuit Breaker: Complete Guide and Safety Steps
Learn how to test a circuit breaker safely with step-by-step methods, required tools, and testing procedures. Discover voltage testing, insulation resistance testing, timing analysis, and common fault signs for reliable electrical system protection.
Testing a circuit breaker is an important process to ensure electrical systems remain safe, stable, and reliable. Proper testing helps prevent electrical fires, power failures, and equipment damage.
Whether you are a homeowner checking a tripped breaker or an electrical technician performing professional testing, understanding the correct procedure is very important.
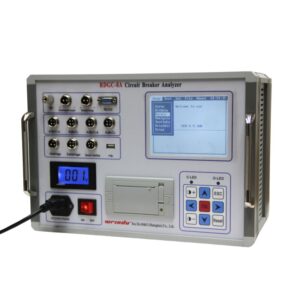
Click the image to know more about Circuit Breaker Comprehensive Tester.
Why Is Circuit Breaker Testing Important?
Circuit breakers protect electrical systems by stopping current during faults such as overloads or short circuits.
Testing is important because it helps:
- Prevent electrical fires
- Avoid unexpected power outages
- Detect faulty breakers early
- Improve system reliability
- Reduce repair costs
What Safety Steps Should Be Taken Before Testing a Circuit Breaker?
Safety must always come first when working with electrical panels.
Before testing:
- Turn off the main power supply
- Confirm no voltage using a non-contact voltage tester
- Wear insulated gloves and safety glasses
- Stand on a dry, insulated surface
- Ensure the area is not wet or damp
- Identify breaker labels clearly
Never work on a live electrical panel without proper training and equipment.
What Tools Are Needed for Circuit Breaker Testing?
Common tools include:
- Digital multimeter (voltage and continuity testing)
- Insulated screwdrivers
- Non-contact voltage tester
- Clamp meter (current measurement)
- Megohmmeter (insulation resistance testing)
- Circuit breaker analyzer (advanced testing)
Professional testing equipment from companies like Wrindu is used for industrial and high-voltage breaker diagnostics.
How Do You Test a Circuit Breaker Step by Step?
Step 1: Inspect the breaker visually
Check for:
- Burn marks
- Discoloration
- Corrosion
- Overheating signs
Step 2: Turn off main power and open panel
Remove the panel cover carefully after confirming power is off.
Step 3: Measure voltage using a multimeter
Set the meter to AC voltage (e.g., 120V or 240V).
- Place black probe on neutral bar
- Place red probe on breaker terminal
If the breaker is ON, you should read normal voltage.
If OFF, voltage should be zero.
Step 4: Perform continuity test (power OFF)
Switch multimeter to resistance mode:
- ON position → low resistance (good breaker)
- OFF position → infinite resistance
Step 5: Test tripped breaker behavior
Reset the breaker:
- If it trips immediately again, it may be faulty.
What Is Insulation Resistance Testing?
Insulation resistance testing checks whether electrical leakage exists inside the breaker.
A megohmmeter applies high DC voltage to measure insulation quality.
Good insulation typically shows:
Low resistance means:
- Moisture inside
- Dirt contamination
- Aging insulation
What Is Contact Resistance and Timing Test?
Contact resistance test
This test checks resistance across breaker contacts.
- Normal value: very low (micro-ohms level)
- High value means worn or damaged contacts
Timing test
This test measures how fast the breaker opens and closes.
- Delay beyond normal range indicates mechanical issues
- Affects fault protection speed
What Is Primary and Secondary Injection Testing?
Primary injection testing
- High current is injected through the breaker
- Simulates real fault conditions
- Checks full protection function
Secondary injection testing
- Tests electronic trip units separately
- No full system power needed
- Common in molded case breakers
What Are Common Circuit Breaker Testing Methods?
- Visual inspection
- Voltage testing
- Continuity testing
- Insulation resistance testing
- Timing analysis
- Mechanical operation test
Each method helps detect different types of faults.
How Often Should Circuit Breakers Be Tested?
Typical recommendations:
- Home systems: every 6–12 months
- Industrial systems: every 1–3 years
- High-voltage systems: based on safety standards (e.g., NETA)
What Are Signs of a Faulty Circuit Breaker?
Common warning signs include:
- Breaker trips frequently
- Burn smell or marks
- Cannot reset properly
- No continuity in ON state
- Overheating
What Should You Do If a Breaker Will Not Reset?
Possible causes:
- Electrical overload
- Internal damage
- Short circuit in wiring
Steps:
- Disconnect load
- Retest circuit
- Replace breaker if faulty
What Is the Difference Between Low Voltage and High Voltage Testing?
- Low voltage testing: focuses on continuity and basic function
- High voltage testing: includes insulation, timing, and advanced diagnostics
Why Is Professional Testing Important?
Professional testing ensures:
- Accurate fault detection
- Safe operation
- Longer equipment lifespan
- Reduced downtime
Advanced diagnostic tools improve reliability and prevent system failure.
FAQs About Circuit Breaker Testing
Q1: How often should I test a circuit breaker?
Residential breakers should be tested every 6–12 months. Industrial systems follow stricter standards.
Q2: Can I test a circuit breaker without a multimeter?
Yes, but results are less accurate. You can reset and observe operation, but a multimeter is recommended.
Q3: What does it mean if a breaker keeps tripping?
It may indicate overload, short circuit, or internal breaker failure.
Q4: What happens if a breaker fails insulation testing?
It means insulation is weak due to moisture, dirt, or aging, and the breaker may need replacement.
Q5: Why is timing test important?
It ensures the breaker can disconnect faults quickly enough to protect equipment and people.
Q6: What tools are best for professional breaker testing?
Common tools include:
- Circuit breaker analyzers
- Megohmmeters
- Micro-ohmmeters
- High-current test sets
Q7: Is circuit breaker testing dangerous?
Yes, if not done properly. Always follow safety procedures or use trained technicians.
Conclusion
Circuit breaker testing is essential for maintaining electrical safety and system reliability. By using proper tools, following safety procedures, and performing regular inspections, faults can be detected early and serious electrical hazards can be prevented.
